

Okay here it is... with all of it's scientific genious... Ladies and Gentlemen... May I present the "Mr. Bigglesworth's Kitty Litter Bucket Garden Bed"

Okay first the name... Named after the kitty whose bathroom habits resulted in his owner donating the buckets on freecycle. I figured the cat's name was Mr. Bigglesworth, not that the gal who gave me the buckets is in anyway Frau Farbissina or related to Dr. Evil in any manner. Now for the facts:
1- each bucket is home to a tomato or cucumber. There is another option of this bed in the green house where my hot peppers are roosting.
2- The ease of each bucket as opposed to actually digging a bed for the plants. Each bucket holds approximately 1/2 cubic feet of soil/compost/potting soil. So it doesn't get very heavy, making moving it around a breeze.
3- The lid from the litter bucket acts as the buckets "personal mulch" and also the irrigation device that waters the plant.And since it acts as mulch...no weeds. The Bottle fitted in allows it to water the plant. An option to this would be to cut up black garbage bags and put them on the buckets using the lids "rings" (the lids with the center cut out leaving only the ring to snap onto the bucket) as a mulch. I fitted some tubing from the bottle to the dirt to act as a soaker hose.
4- A Big piece of cardboard as a weed block. Don't do this if you don't want your grass to die.
The real advantage of this was getting space for garden without a actually doing any work. LOL
How to make the lid Watering device:

1 Take the lid from the bucket. Notice it is marked with a 3" hole. Cut the whole.
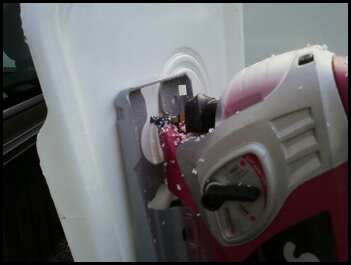
(Use either a hole saw or a jigsaw- I used the jig saw)
Cut the hole for the pop or water bottle to set in.

I found that using a 7/8" Hole saw work best, but I am guessing a spade bit or a "step bit" would work as well. When the hole is cut, ream out with a knife until a plastic pop bottle neck with threads fits in. Then take the cap and screw on the bottle from the bottom of the lid.
Drill a hole in the bottle cap just a tad under what ever size vinyl tubing you use to water the plant with.(I used 1/4" tubing) Then insert the tubing through the bottle cap, approximately 3/4 " the way up.
Now comes the tricky part...

Poke some holes in the tubing using a screw. Careful not to poke all the way through the tubing. And stick the screw in the open end of the tubing to plug it.
Or do my plan b- Use the same amount of tubing and stick the end in the planter right buy the roots of the plant. I find this works just as well, the bottle empties out a tad faster but we don't care so much how fast it empties.
ROB'S PS- I have discovered that just sticking it in the dirt (the "plan B") works kind of like one of those there Aqua Globes you see on TV- So maybe that version is more like a SWP!
Attach the lid to the bucket and wait for the damn plant to grow. This isn't as scientific as a self watering planter, but hey it kept me busy for the better part of a day. And, if I am busy then I ain't getting in trouble.


4 comments:
Okay, if I'm still planting on the deck next year, I'll be trying it with these! Nice and easy!
OK, you're laughing at my parking meters, and I'm looking at this and thinking "Phew, that's a lot of sawing! I'll just plant in the ground ..." :)
Great idea though -- I like the self-watering. And you are in a wetter climate which I'm sure means more vigorous weeds (and thus greater incentive to avoid them).
4-Bushel- it really is easy. I would imagine perfect for a deck garden.
Suzanna- It really isn't a lot of sawing. Easier than feeding a parking meter!!!
I read "Use either a hole saw or a jigsaw- I used the jig saw" at first as "use either a hole saw or a chain saw."
You can see where my mind's at. Power tools on the brain. Not tomatoes
Post a Comment