Showing posts with label repost. Show all posts

Wednesday, July 30, 2014

Repost: Adopting Shelter Dogs Works For Me! From 4/10/13


I have two dogs whom I adopted from less than Ideal situations. First, Romeo, a “Cocka-Poo” (Cocker Spaniel/Poodle). He is my calming influence. A good natured happy guy with good manners. Always ready for a game of “ball” or “stick”, plays well with others, as long as they don’t do much “Biting” (he hates that). I adopted Romeo when a gal at work, who owns a boarding kennel, put an ad in our Intra Net classifieds. It appeared Romeo was boarded at the kennel, and the owner, skipped out on paying and skipped out on Romeo. Well first look at Romeo and I was in love. I recognized his calmness, and his love of riding in the truck almost immediately (His favorite place to sit in the Truck is right on the back of the seat- I am thinking so he can look out both front and rear windows. Anyway He is a good dog, one of the best I have ever had!

   
 Buddy, my little “Cocka-Tsu” (Cocker Spaniel/Shi Tsu) on the other hand, well if Romeo is my calming influence, Buddy is my “Let’s go out and ride that damn roller coaster” influence. He is my little comedian. And a great source of entertainment. And when I say “adopted from less than Ideal situations, he wasn’t abused or anything. He was a foster dog at A.A.R.F. and waited a long time for a forever home. People that would try him out, I’m afraid were not patient, expecting a perfectly mannered canine. And get sent back. And while his “foster parents” are all great people, that has got to mess up a dog’s confidence.  Buddy likes to bark and play. And if he is hurting will bite (nip) when you touch him. I can’t blame him for that – I am the same way. So I let him bark when he is hungry until it is dinner time. And it is fine. So with Buddy you have to practice patience.
  

 My adopted pets work for me. Maybe it’s because they have such opposite personalities. Maybe it’s because I think of them as children. All I know is adopted dogs that others have work for them. Sometimes you just have to wait it out!

Monday, November 4, 2013

BLOG REPOST FROM 6/29/2009: HOW TO MAKE A SWP!

Since I demonstrated how to make a SWP (Self Watering Planter) over the weekend, I thought I would repost this post. Good info to know if you want to grow some of your own food and don't have room for a garden! A few have commented on my SWP's, and a few more have sent me emails askinf how I make them. Well luckily I had one more Pepper to transplant so I needed to make one. The actual idea comes from Gary Ibsen's Tomatofest website, where they are called EarthTainers™. He and his friend Ray,(the original inventor of the EarthTainer™) ask that if you use their design that you simply make a donation to Feed the Children. Since I basically use the same directions- no problem. I just wanted a free or cheaper way of making the SWP's instead of buying roughneck totes to make them. Cheap Veggie Gardner should appreciate this stinginess thriftiness.
Anyway if you don't want to look at the videos, here is how I make SWP's
First I get 2 buckets in this case a 5 gallon and a 3 gallon bucket. You can get these from restaurant type places- just ask! (Thanks Wah Kue Café!)
Then in one bucket cut a hole big enough for a plastic planter or a tomato can to fit in this case I am using a galvanized steel planter I had laying around. If you have access to hole saws this is easy. Or use a jig saw. A jab saw or drywall saw will work as well, This time I used a jigsaw.

Then make a hole towards the side of the same bucket big enough to fit a piece of PVC Tubing through.


Then drill some holes in your tomato can or planter.
Most buckets will fit together leaving about 2" of room between the two buckets- I don't have to worry here as I am using a 3 gallon and a 5 gallon This is good as the bucket will have some room between the upper bucket –or planter and the 2nd bucket or “reservoir”. If it doesn’t HAve this lip or the top bucket goes all the way down simply insert a brick or a couple of rocks in the bottom bucket to raise the top bucket.
That done, drill a hole in the bottom bucket, taking note where the top bucket’s bottom is. Drill the hole just below the bottom of the top bucket. Put the PVC tubing in the hole you made for it.
. . Now fill it with about two cups of soil into your tomato can/planter, fill with water.
Fill the rest of the top bucket with soil and make sure to water a bit between layers of soil or compost. Until it is full and wet. Some times I rip up old t-shirts and make a “wick” throughout the planter. But I have seen no evidence yet in the planters I have done this to that it is any better than letting the soil “wick” the planters. Then plant your plant or seeds in it. When watering fill the bottom bucket through the PVC tube until water comes out the drain hole you drilled. You now have a Self watering planter! Very nice if your forget for a day to water or you go out of town for a weekend. Saves on water as well. If you like you can cut the lid to the bucket, leaving only a ring, then take a garbage bag or you can use a plastic shopping bag put over the bucket and snap your ring on- works as a mulch cover!

Thursday, August 16, 2012

BLOG REPOST- LOSE THAT JUNK IN YOUR TRUNK!

I bought gas yesterday - $4.00 a gallon!!! So I think it is time to re-post this from 9/5/08 how to increase some gas mileage!  
Before- my trunk runneth over
LOSE THE TRUNK WEIGHT, JUMBO-I found a new way to increase the gas mileage of my vehicles. Unload your trunk. Today's cars are built for very little tolerance of weight.This is a trick from hyper milers- they will not only unload the trunk, they will take out seats and the spare tire, and other things I am just not ready to do. But I can unload the crap out of my trunk. Upon a recent inventory of my trunk, I have a bag of rocks (for landscaping), a bag of top soil, miscellaneous tools,Cans of paint, which weigh in all total approximately 160 pounds or 1 average person. "Hey fat ass, get outta my car!" Anyway with that all removed and a few items from the back seat- (Amazing how one person can get all this into one sub-compact car, but hey when you have talent...). And the next time you have a flat and don't have to spend an hour taking everything out of your trunk to get to the spare, you'll thank me.

What? You don't carry a 60 pound bag of crushed marble in your trunk?

Now it is clean ORGANIZE-
Now some folks like to put organizers in there car to keep things separate. And I have seen these things for sale at ridiculous prices! I say scaaaaaaareeeeeeew that and use what you got. You can put things in plastic grocery bags even. Me- I choose to use all the lap top bags I have. This way you can reuse an item and organize your trunk at the same time. I have also used 1 gallon plastic plant pots(for loose tools), milk crates. Anything that fits.
After- Clean and light! Yes I know it still needs vacumming!

Wednesday, August 1, 2012

REPOST: A Truck Wheel BBQ

This repost comes from my old DYI Blog, dated August 2, 2009 . It involves a truck wheel (which everyone has laying around in their yard, yes?) some furniture legs from IKEA, some hardware cloth and a grill. And yes years later it is still in use! Ever wonder what to do with those old truck wheels? You know the ones sitting in your yard? Well here is one thing I made- A bbq! Here are the steps:

Find an old pick up wheel (I got mine on Free-Cycle), Pick up a package of Ikea Capita legs- the 8" legs would have been better ( I had the 6" legs sitting around). Then take the leg mounts and put them on the deep side of the truck wheel, screw the legs through the other side, pick up agrill top (mine is for a weber grill- 18") or take one off an old bbq, Use some hardware cloth (fencing) Inside the deep end for an ash catcher. And you are done! Happy BBQ'ing!


Note: You might want to add some small C-Clamps to keep the grill centered orwhat I did is put some nuts and bolts through the top of the grill to act as a stopper!

Monday, June 25, 2012

REPOST- Portabello Parmesano!

From September 8, 2009 Portabello Parmesano - one of my favorite Meat Free Recipes!
PORTOBELLO PARMESANO

Not being a big fan of eggplant, or veal (Okay I lie, I love veal, just not how its raised) I resorted to making Portobello Parmesan years ago. I saw it somewhere on TV. I like this as much as veal. Really!
(You can use Canned tomato sauce or fresh- it works either way)
4 portobello mushrooms
2 tablespoons of olive oil
Tomato Sauce either 1 jar canned or one and a half cups fresh sauce
1 cup of fresh, shredded parmesan cheese
Heat the olive oil in a heavy skillet, the kind you can put in the oven. Remove the stem from the portabellas. Brown the portabellas on both sides when browned, dump the sauce on top, Simmer for 5 to 10 minutes. Then cover with parmesan cheese. Put the whole pan in the oven at 350 degrees for 25-30 minutes, or until cheese is a bubbly brown. Serve

A Recipe for Fresh tomato sauce
1/4 cup olive oil
6 tomatoes, chopped
3 onions, minced
2 green bell peppers, minced
4 cloves garlic, minced
salt and pepper to taste
DIRECTIONS
In a large saucepan, heat oil over medium heat; add tomatoes, onions, green bell peppers, garlic, salt and pepper to taste. Mix ingredients well; cover and simmer for 30 minutes.

Thursday, June 21, 2012

REPOST- How I make Red Pepper Flakes

This repost is from 9/9/2010 "How I make red pepper flakes". I love them in cooking, on pizza...anywhere a touch of hot and spicy is called for!

I LOVE SERENDIPITY! When the planets allign to give me a subject for a blog post it is so cool!
There was a comment or two yesterday asking how I make red pepper flakes- it is really simple, so this one is for Lisa! (:
First, what I do is spread the peppers in even layers in a food dehydrator. No Dehydrator? I think you have one and don't know it... The Oven! Spread the red peppers in a single layer on a cookie sheet and dry in the oven for 8 hours or overnight at the lowest temperature you oven will allow. If you have a gas oven, the pilot light heat is probably enough.

Remove the red peppers from the oven or dehydrator when they are dry and brittle.

Option A for crushing:
Fill a gallon sized freezer bag with the dried peppers. Put the freezer bag in an old pillowcase.
Use a rolling pin to crush the peppers. Apply pressure as your roll the pin over the bag.

Option B for crushing- Put some of the dried peppers into a food processor or a coffee grinder and process away

Remove them from the bag or food processor when the peppers are crushed as fine as you would like, and store in a container with a shaker top.

Store any extra red pepper flakes in a clean storage bag or jar with a tight fitting lid.

Thursday, June 7, 2012

REPOST: Gutter Garden!

I love repost days. I get a day off and get to feel like I am contributing to the blogoshpere! Serious though I thought this was one of my better "Weird Garden Science" posts. So from 8/25/2011, and 8/15/2011 we have GARDEN GUTTER SUCCESS!
 
Just thought I would give y'all a look at the Gutter Garden all planted and happy!

HOW TO MAKE YOUR OWN HANGING GUTTER GARDEN:

I am going to have a talk with a gal from the community garden who is a professional landscaper on adding drip irrigation to it!

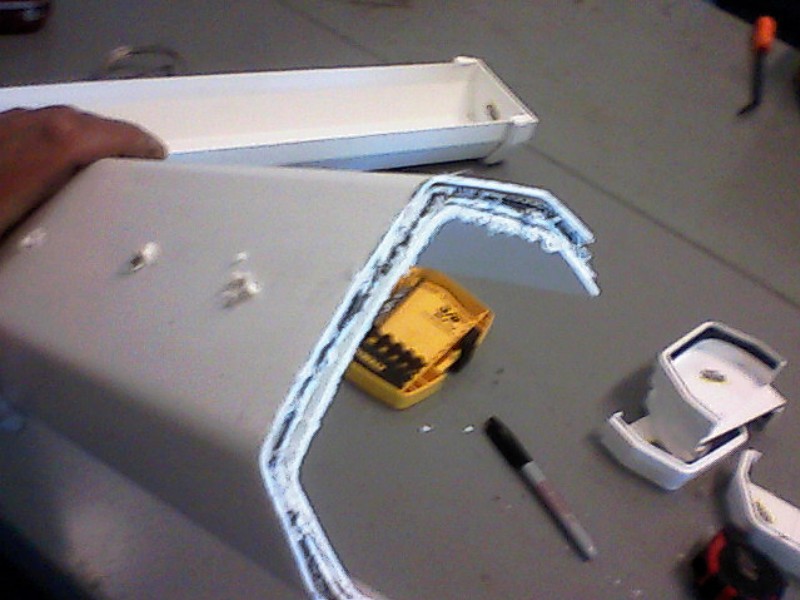
I became so obssesed with the Gutter Garden I had to make one for myself! First problem is I couldn’t find the “U” shaped style gutters they used in theirs, but I did find this kind of hermaphrodited "V" shaped at Lowes for $6.19 for a ten foot section, since I am making 5 levels to my gutter garden, that was great… although the end caps were $2.77 each or $16.62. Still, Under $5 for each section… is more than Do-Able. Of course my garage has those crappy vinyl gutters, and they must come off soon so it is good to know I will have a use for them after their existence has been terminated. Anyway back to the project:
First- I cut the gutters to 5- 23 ½ inch sections

Then I drilled to holes for the Eye Hooks and for drainage
(A quick hint: Since the holes have to be approximately the same measurement on the gutter, you can stack the gutter pieces together and drill them all at once to dave some time and frustration.
Then I installed the end caps
Then I put the eye hooks in,
a ¼”-20 X 2” on the bottom,
and a ¼”-20 X 4” on the upper or inside of the gutter using a coupler nut (so I have an eye hook above and one below so a person could stack the gutters by chain
Then it is done- you can go hang your gutter garden.
I suppose a person could just build on a wall or a fence by installing the gutters like they are on your house, but where is the fun in that? Besides I needed something in this space on the front porch. Now to start planting with chard and lettuce seeds! This would also be perfect for planting strawberries. The total cost ended up being $30.75, but would of course be a lot cheaper if I reused those old gutters on the garage!

Wednesday, May 23, 2012

RE-POST: SWP's 2.0

This week I am re-posting my favorite way to make self watering or SIP's- Self Irrigating Planters!

Perusing the global buckets webpage, I saw an idea to make one out of 1 bucket and the top from a 5 gallon water bottle. So I had to to try one.

Take an ordinary water bucket-cut the top, drill a bunch of holes, put a rage over the pour spout, make sure to drill or cut a hole for a 1" or larger piece of tubing to go into - this is how you are going to add water to your planter!


Shove it in the 5 gallon bucket- pour side to the bottom

Fill with water up to the pour spout, fill with dirt and plant! I put a cayenne pepper in this one- now it goes into the green house for warmth!
Note- You may want to add a few "overflow" holes in the bucket... just put them beneath the level of the water bucket top (where you cut it off), and above the spout! Save the bottom of the water bottle for a bucket, or re-use as a planter!

Thursday, May 17, 2012

BLOG REPOST: Eating the dandelion day by day

This week's repost is one I did on the joys of eating dandelion flowers; note Binky, my yorkie, has since passed away but still keep Chile away from Romeo- especially if she is licking her chops!

My apologies to Lord Tennyson. This post is dedicated to Ms. Chile- who advocates eating bugs, rats and god knows what else (keep her away from my yorkie!) - This is but a simple weed flower, that grows in everybody's yard, especially mine- finally something that Everyone can grow and harvest! Y'all welcome to stop by and get all the dandelion flowers you want!

Dandelion Fritter Recipe and a video: